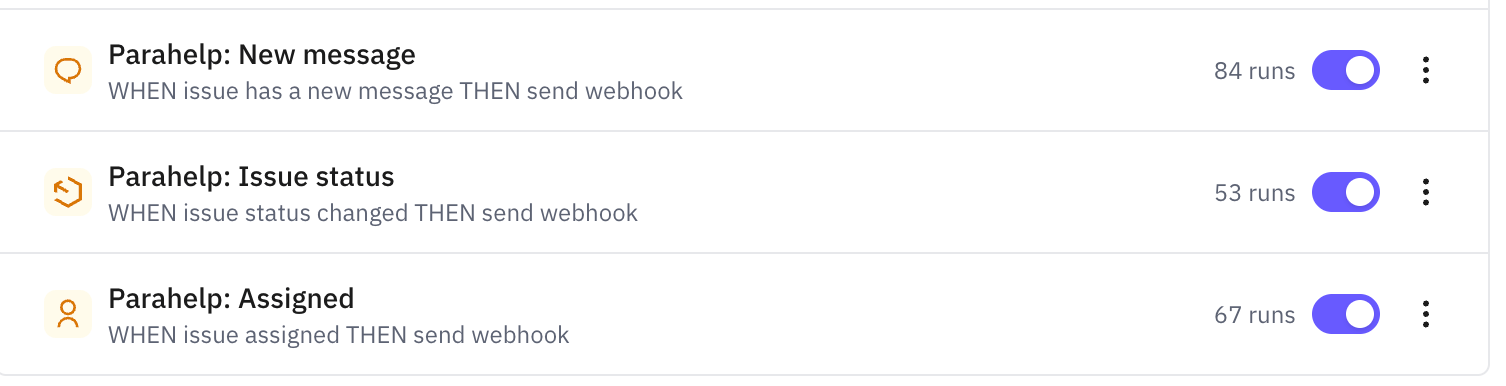
How to connect Parahelp to your Pylon workspace.
1. Create the API token
1
Open API token
Go to Settings → API token (app.usepylon.com/settings/api-tokens).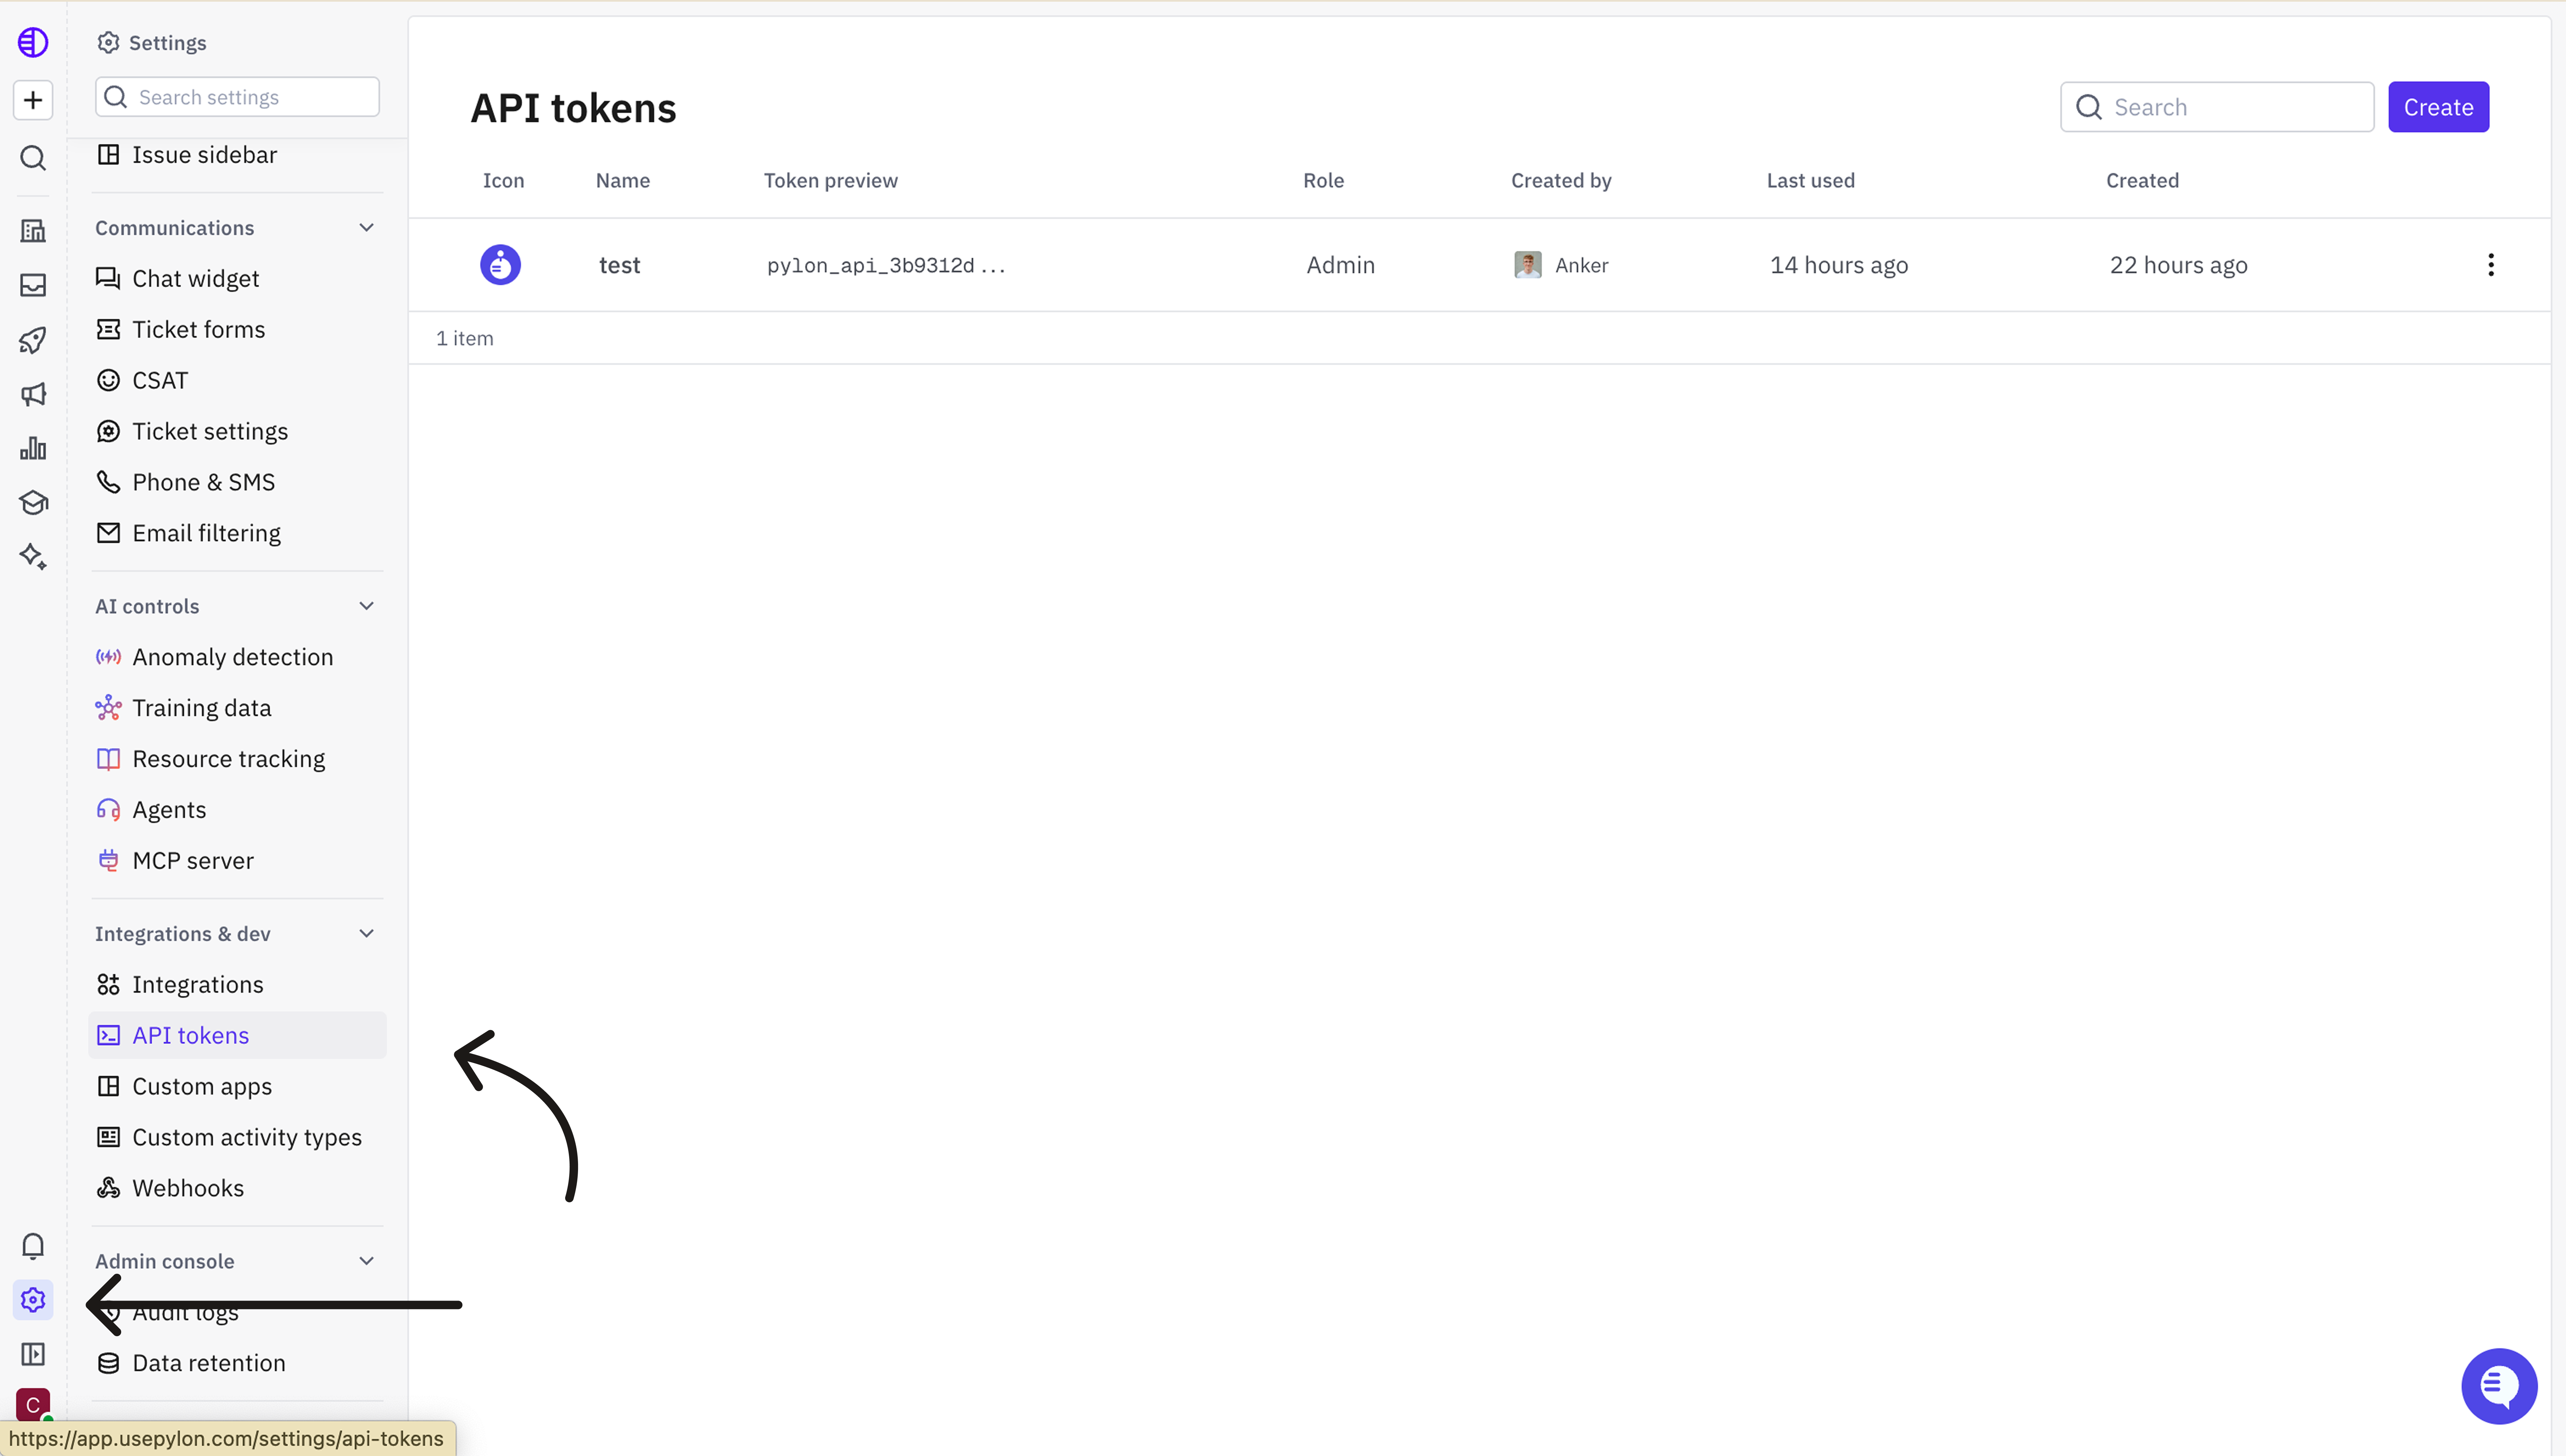
2
Create the token
Press Create, pick the Admin role, and create the token.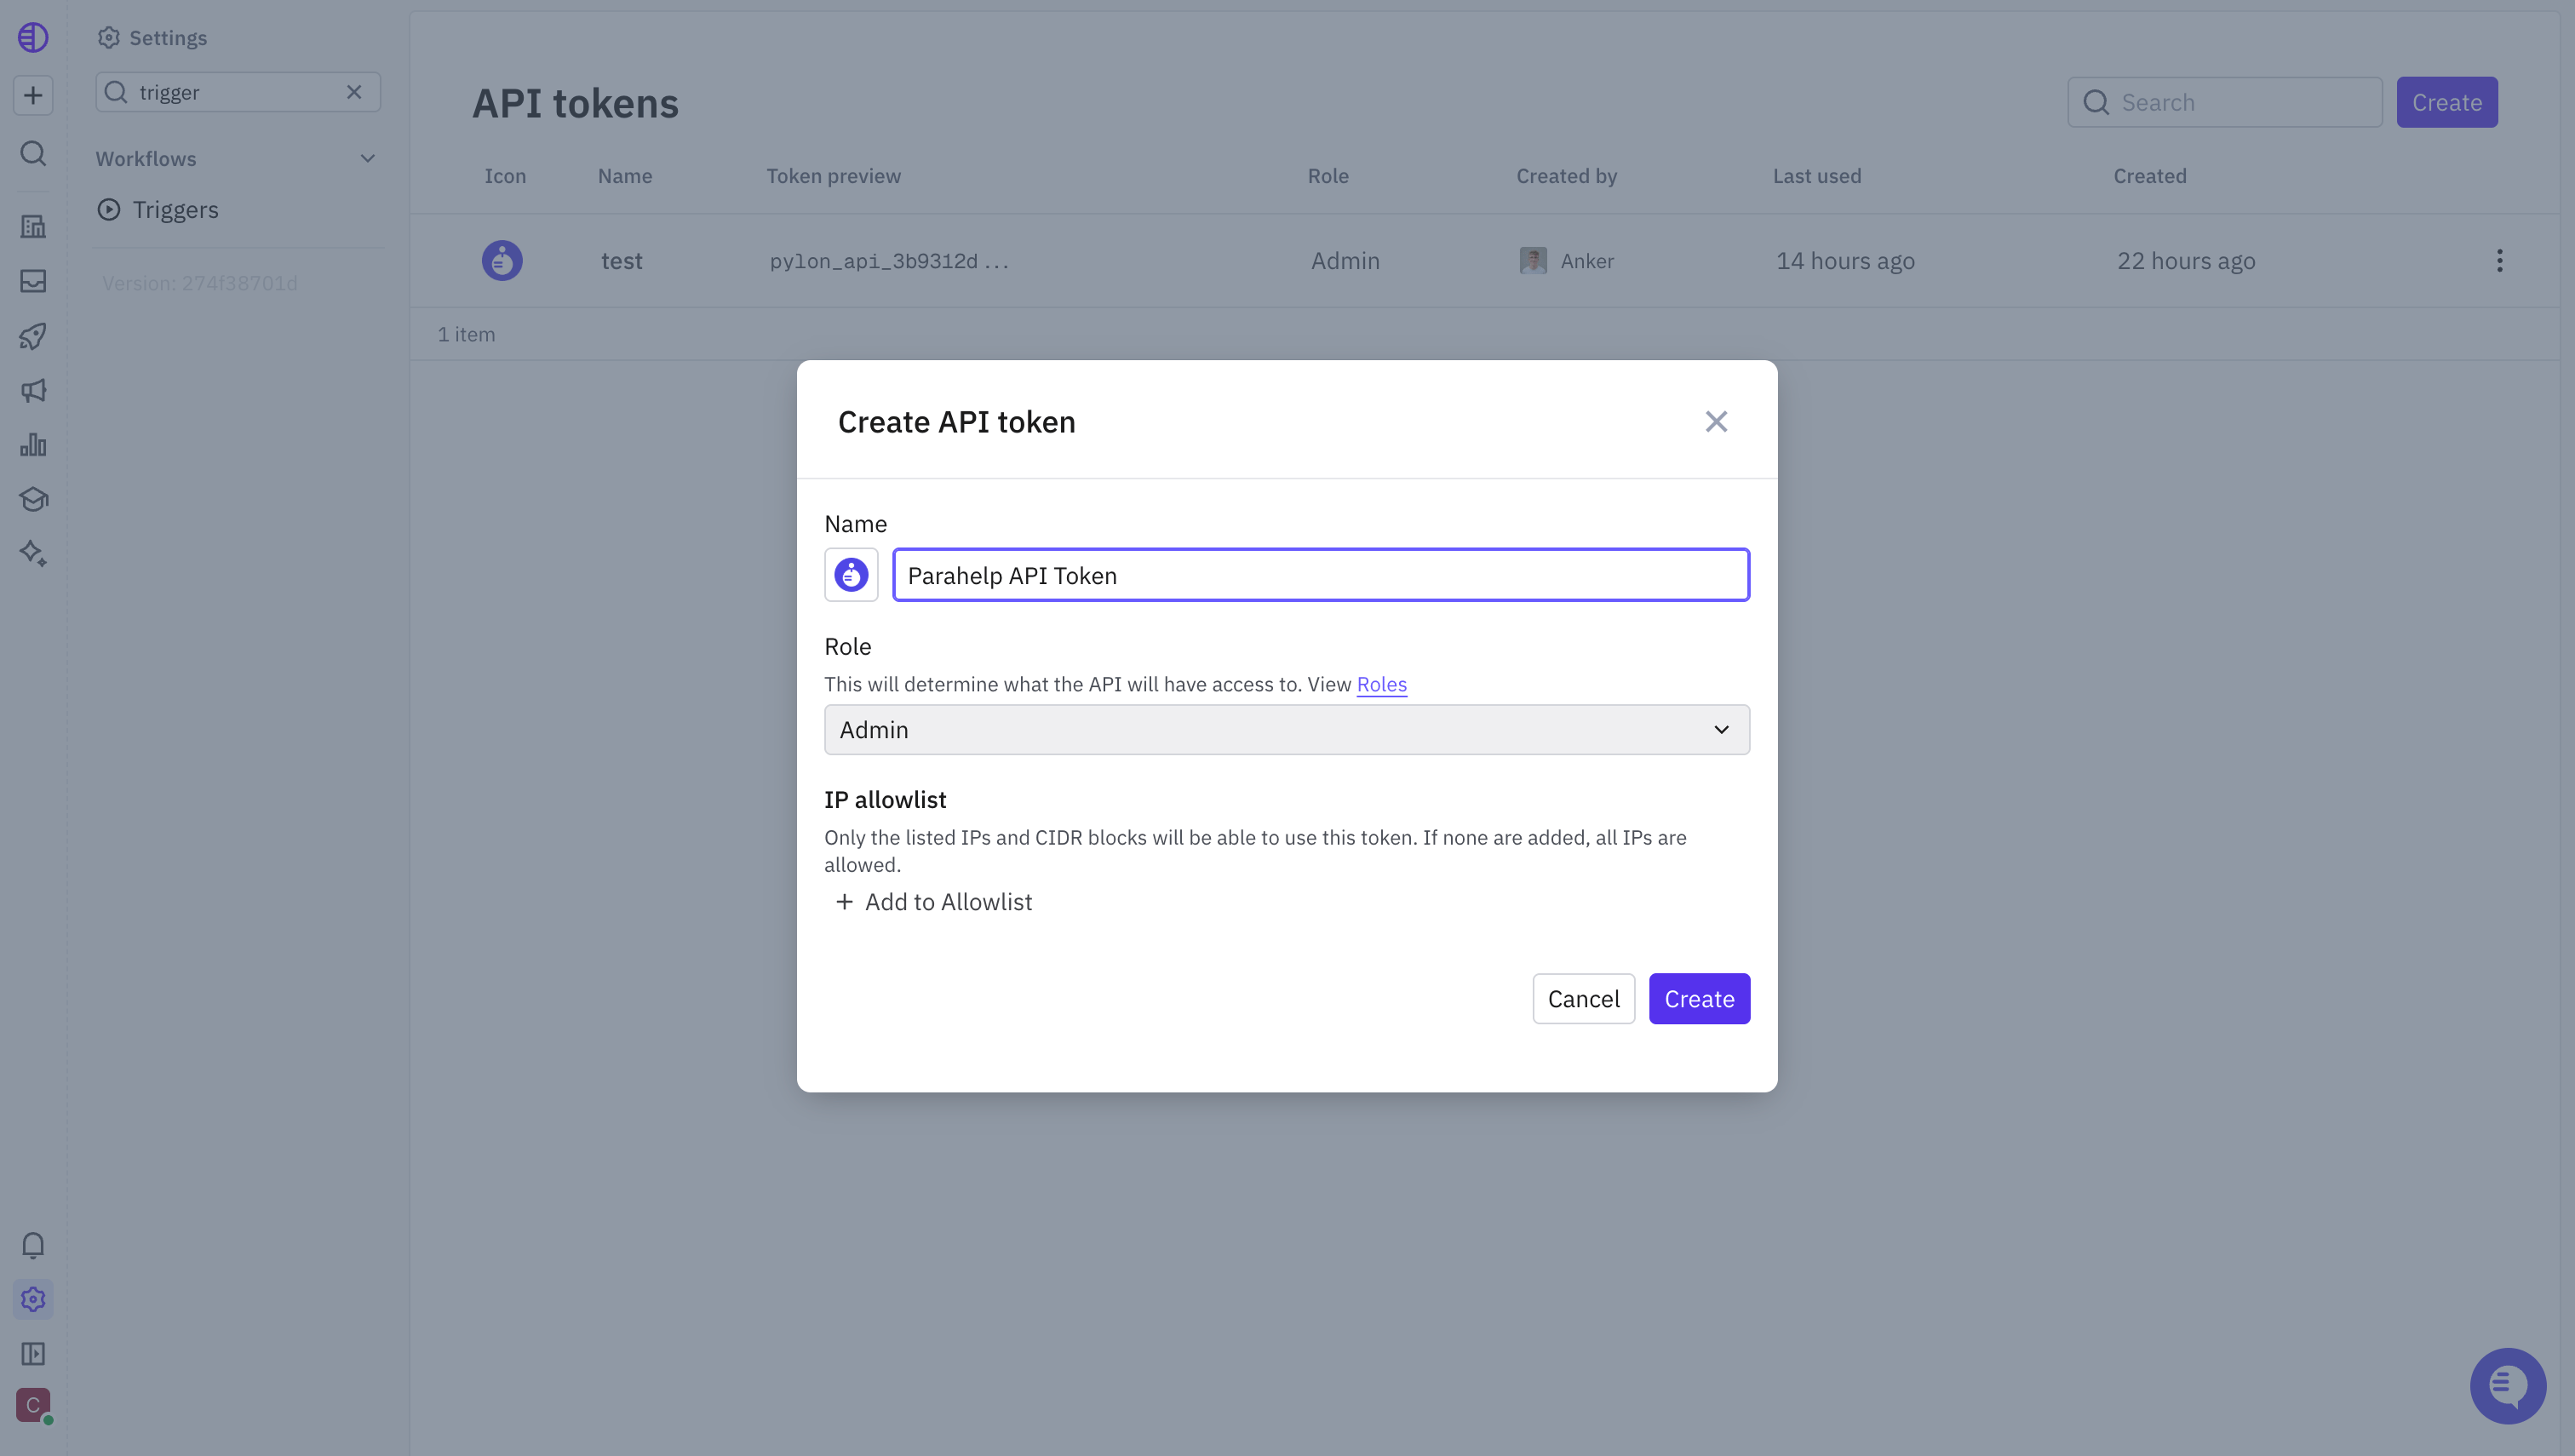
2. Create the support agent user
Create or choose a real dedicated Pylon user account for the agent, with its own email address. We recommendparahelp@yourcompany.com or <agent-name>@yourcompany.com: a real user with a real mailbox, invited like any teammate, not an email alias. Do not use a bot or machine user.
Invite it to Pylon and grant it the role it needs for support work. After the token is saved, Parahelp looks up this user by email so you can confirm it as the support agent.
3. Connect the webhook
1
Open Webhooks
Go to Settings → Webhooks (app.usepylon.com/settings/webhooks).-1.png?fit=max&auto=format&n=TB6wmSx_xxpGEkaA&q=85&s=52464133e9f52ed3d953e75ff5afacf8)
2
Create the webhook
Press Create, call it “Parahelp webhook”, input 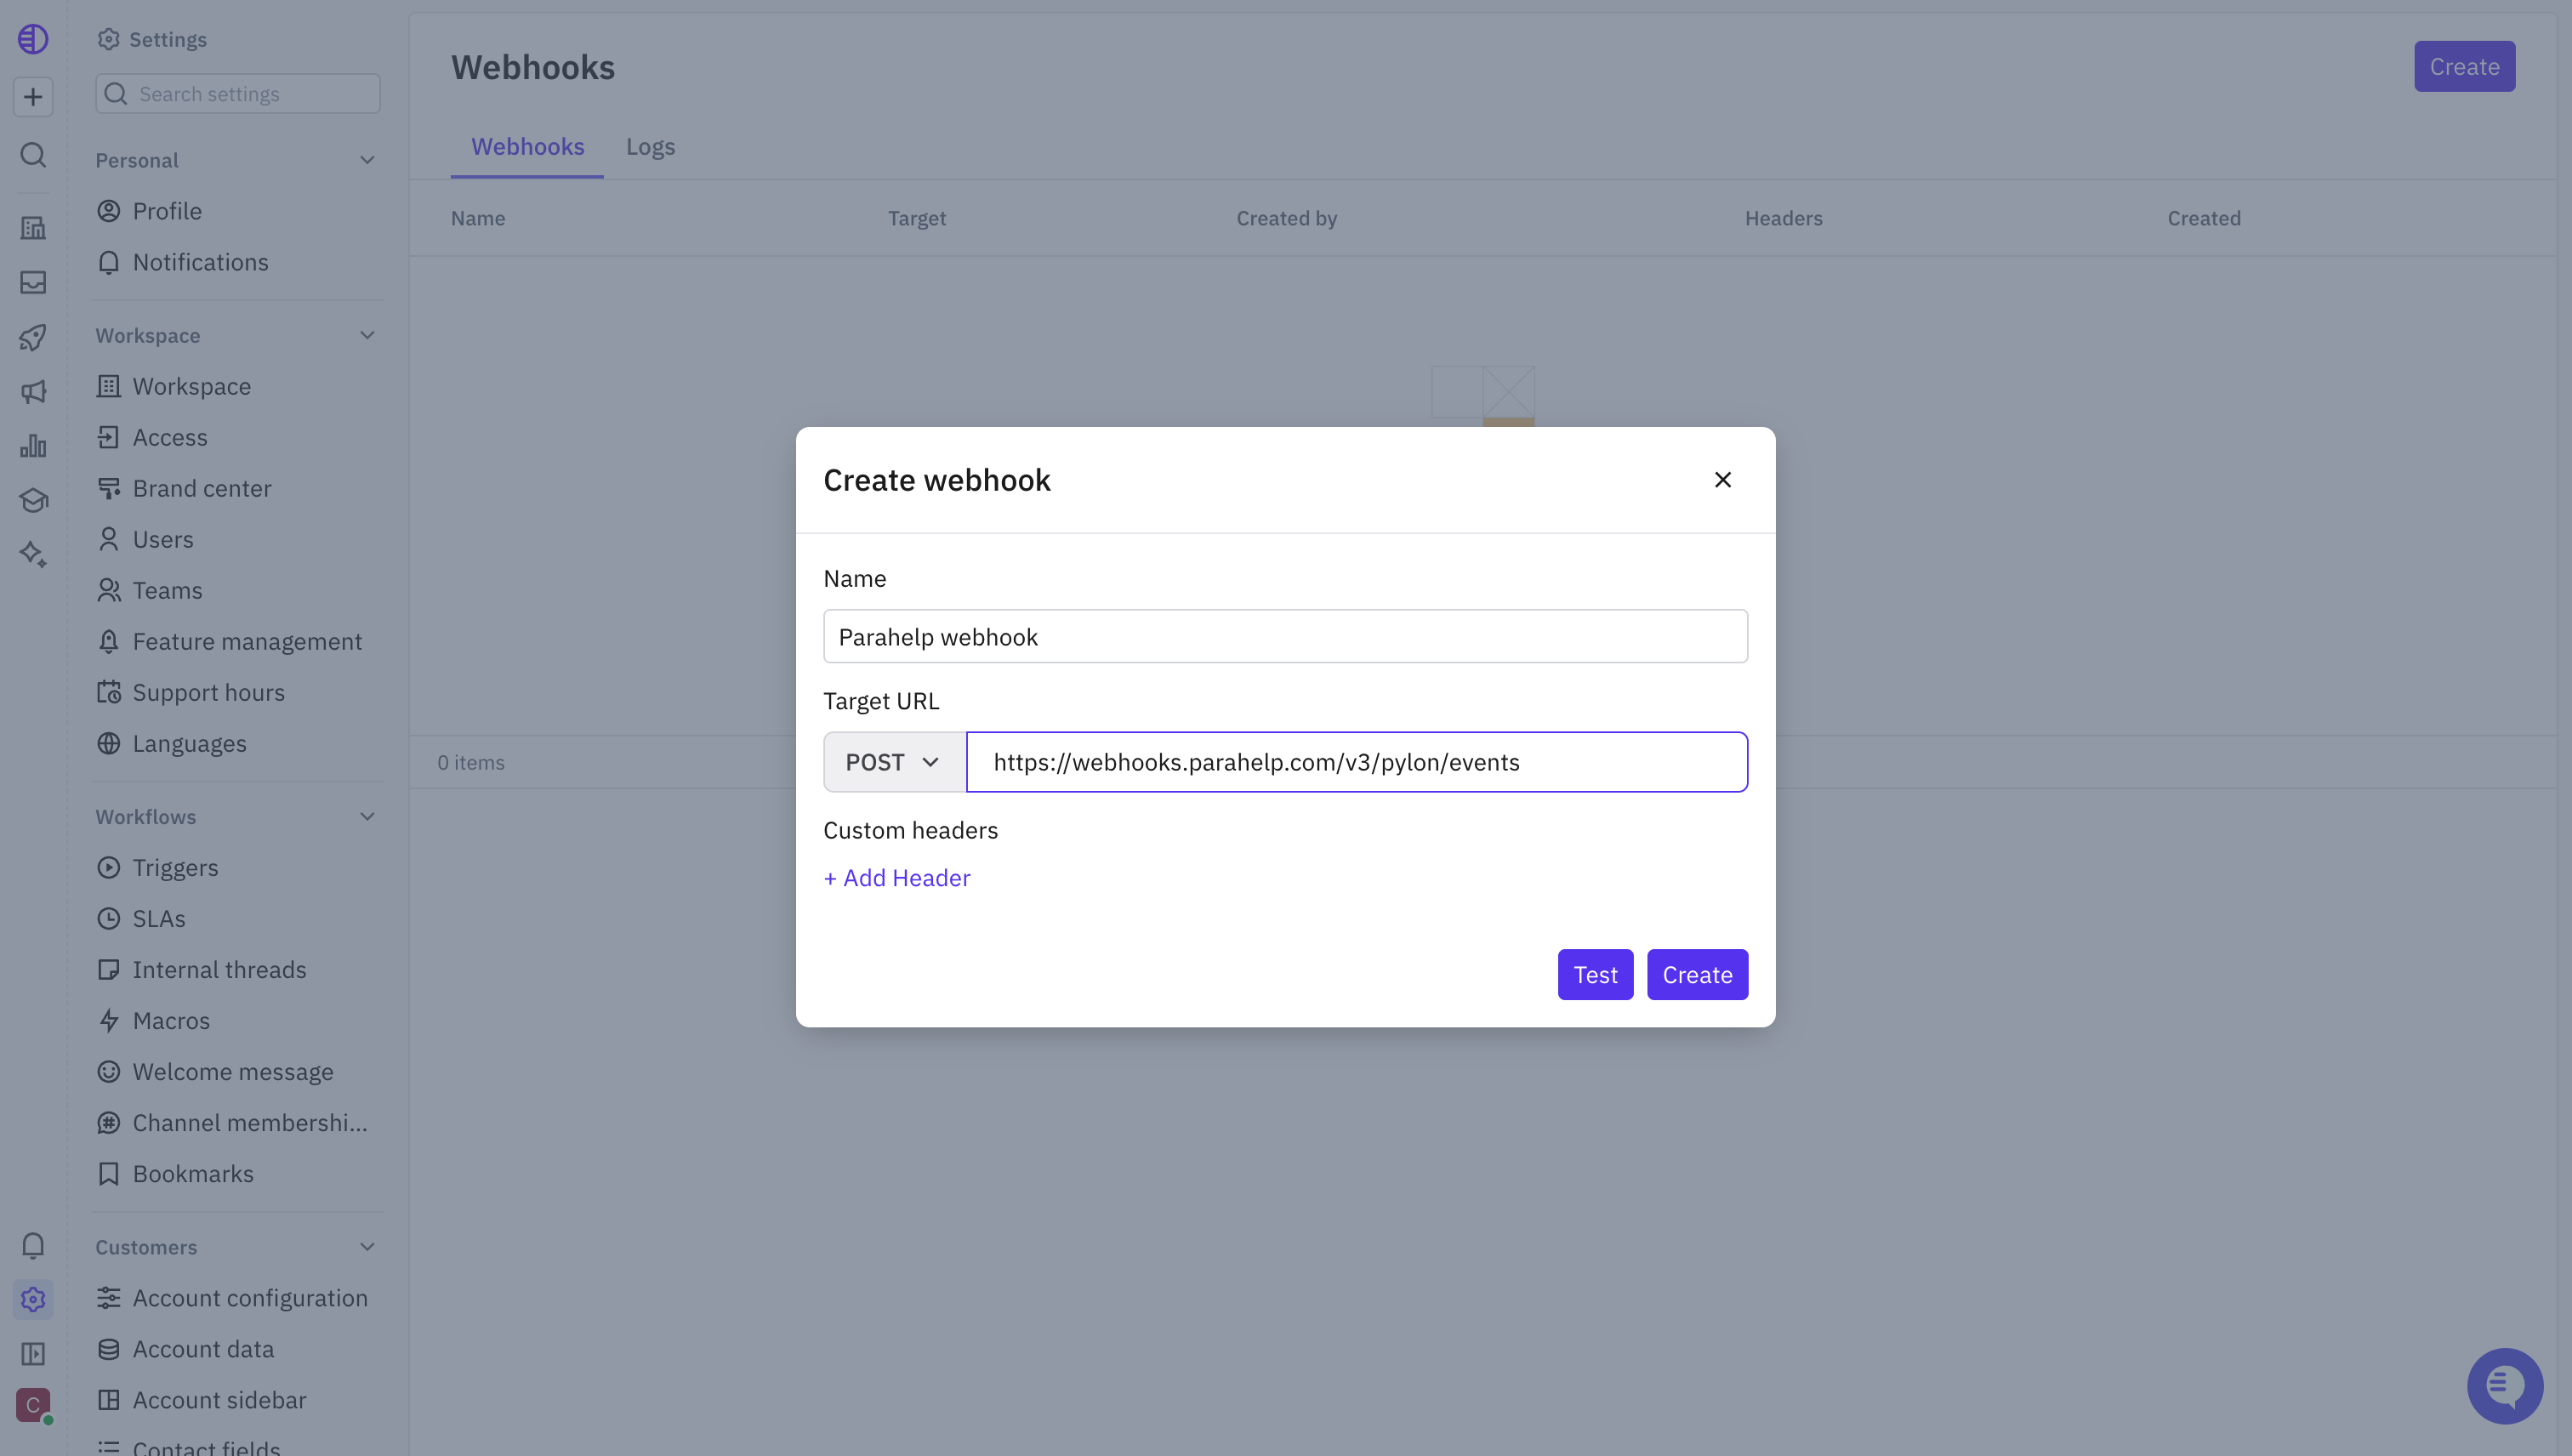
https://webhooks.parahelp.com/v3/pylon/events as the target URL with the POST method.3
Copy the webhook signing secret
Copy the webhook signing secret Pylon shows after creating the webhook. You will paste it into the Parahelp setup form as the webhook secret. Without it, webhook events fail validation.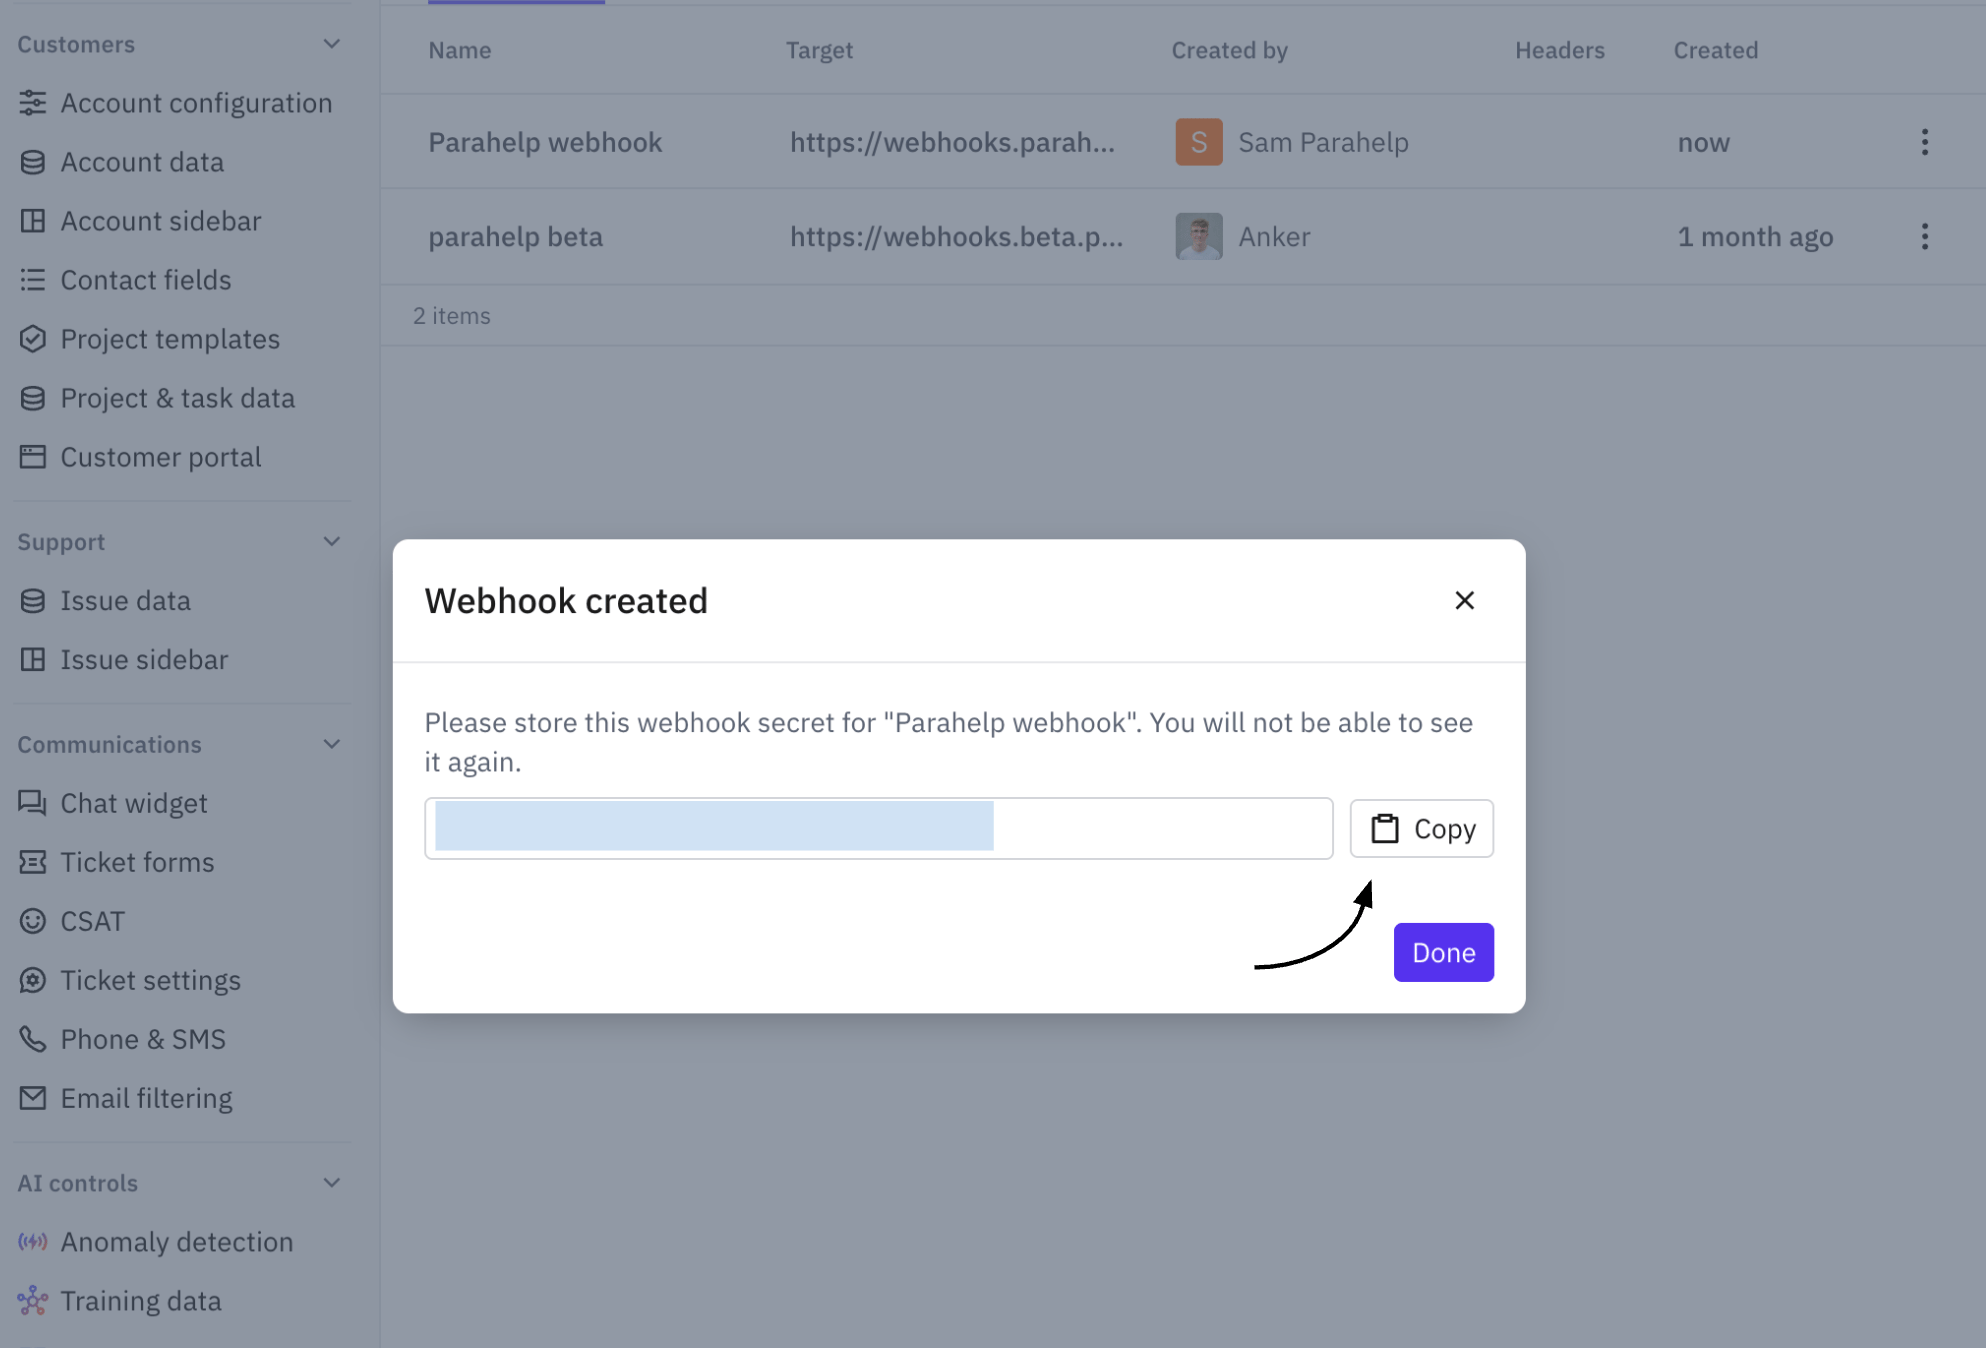
4. Set up triggers
1
Open Triggers
Go to Settings → Triggers (app.usepylon.com/settings/triggers).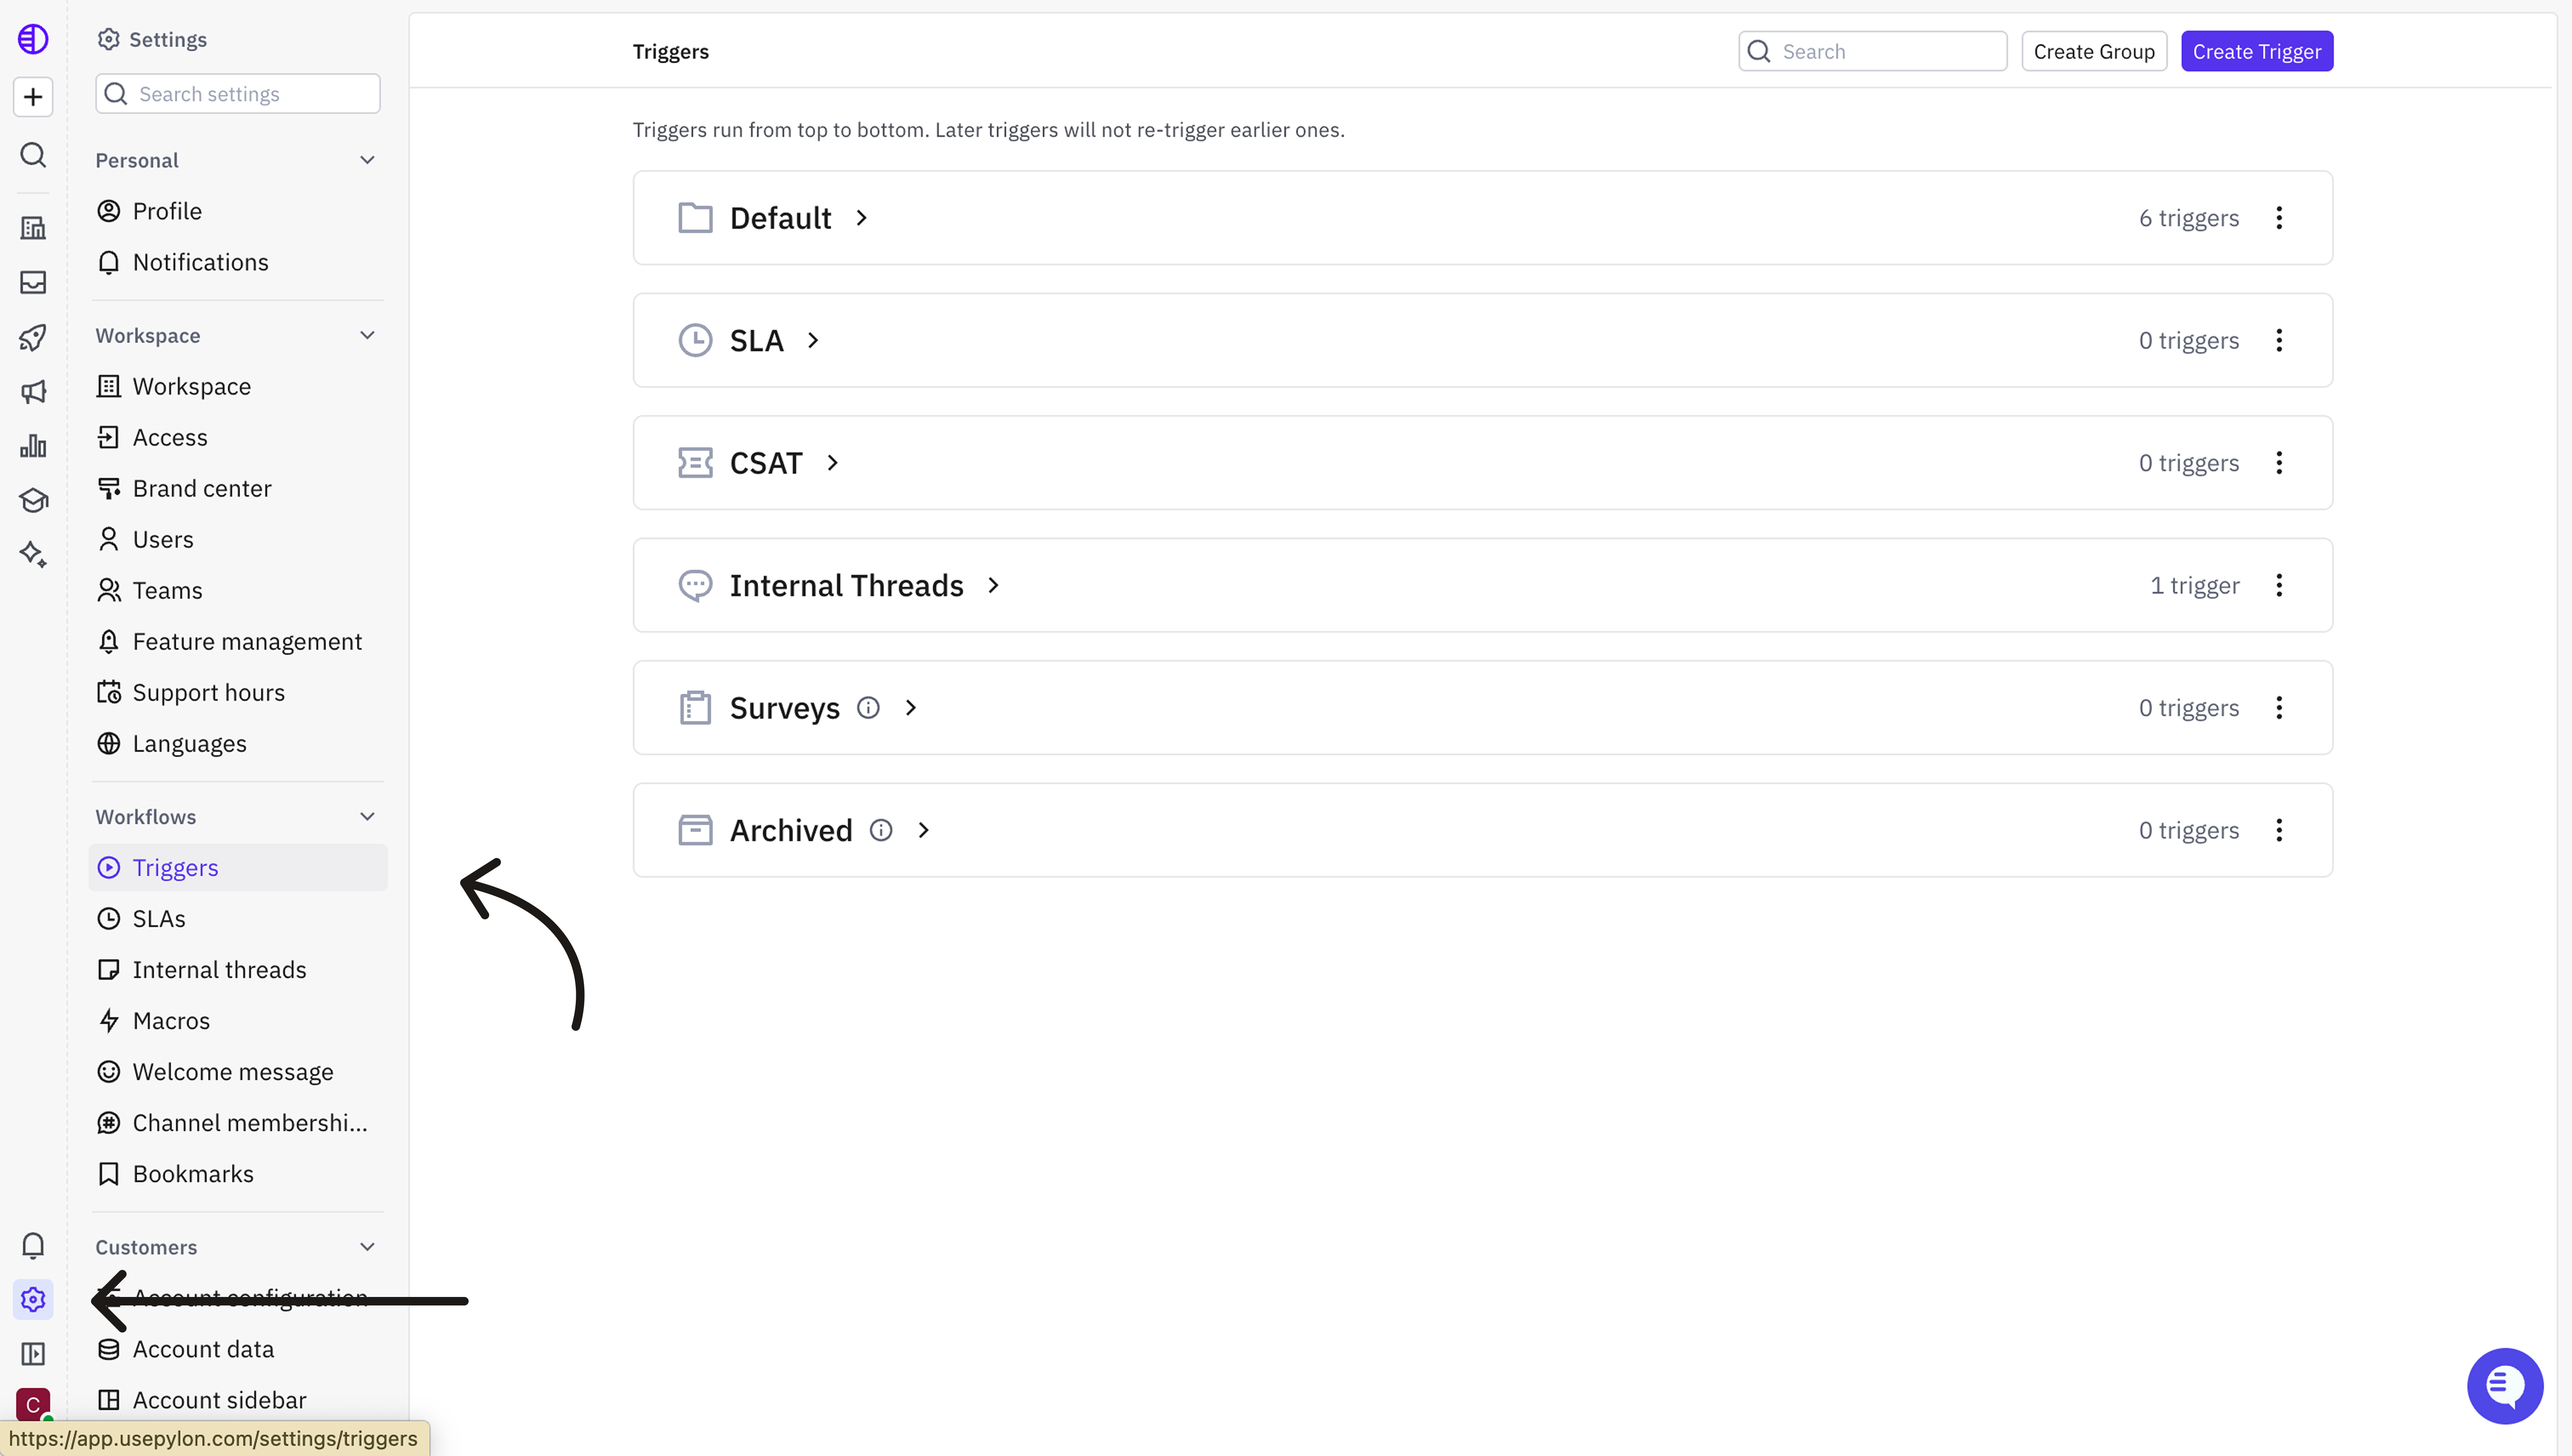
2
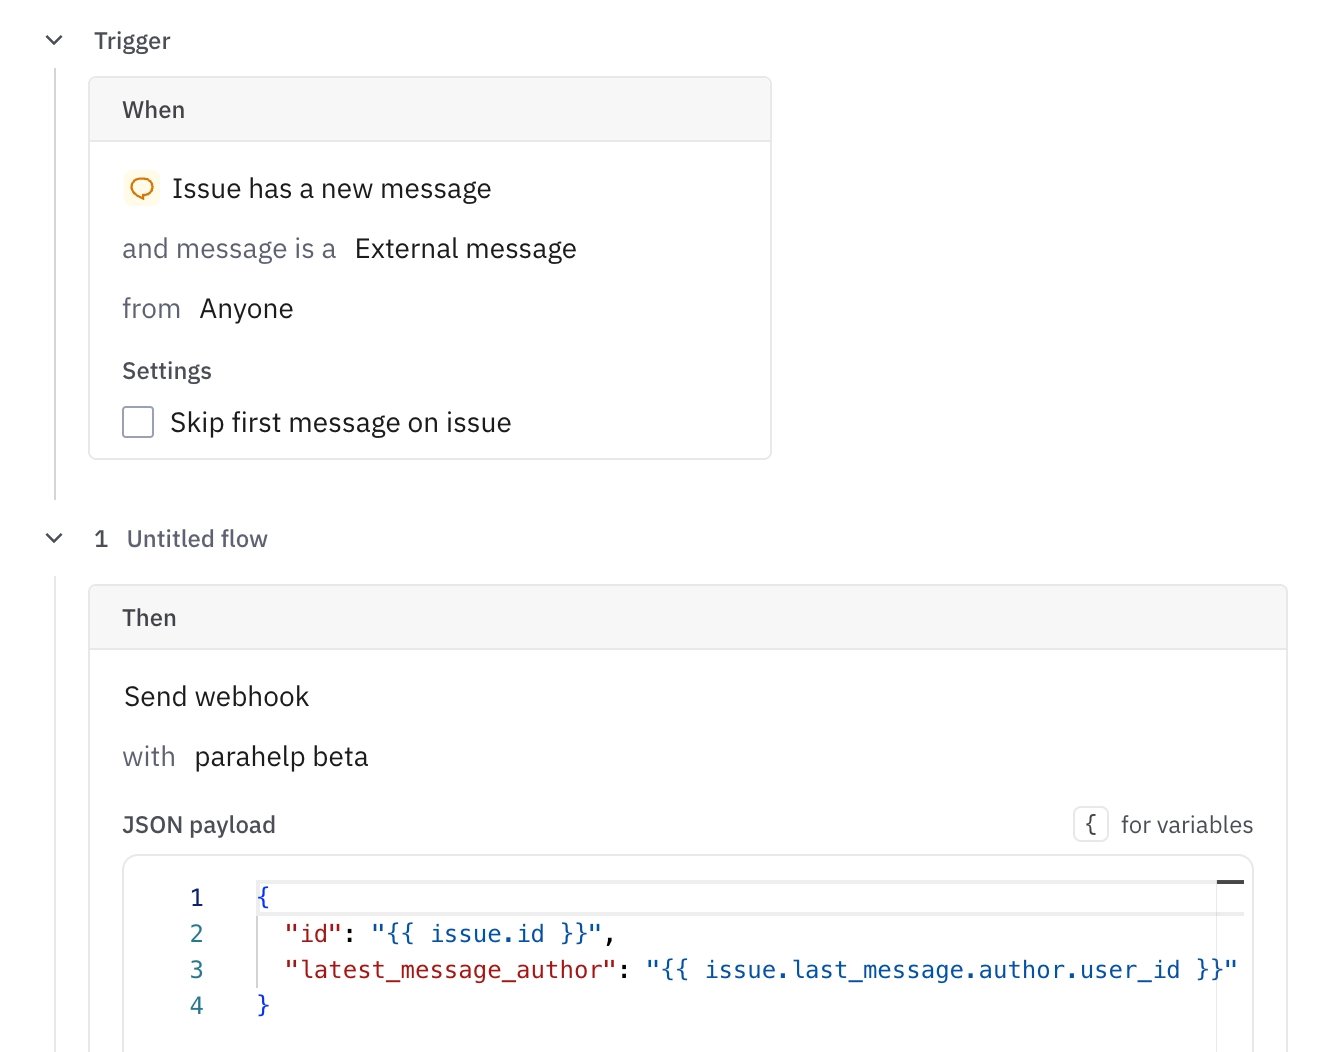
Create a new trigger called "Parahelp: new message"
.png?fit=max&auto=format&n=TB6wmSx_xxpGEkaA&q=85&s=7e3b446c960894e177b758b7ded201d5)
.png?fit=max&auto=format&n=TB6wmSx_xxpGEkaA&q=85&s=37d25b10b3a4f1d260f37ce2121cbb12)
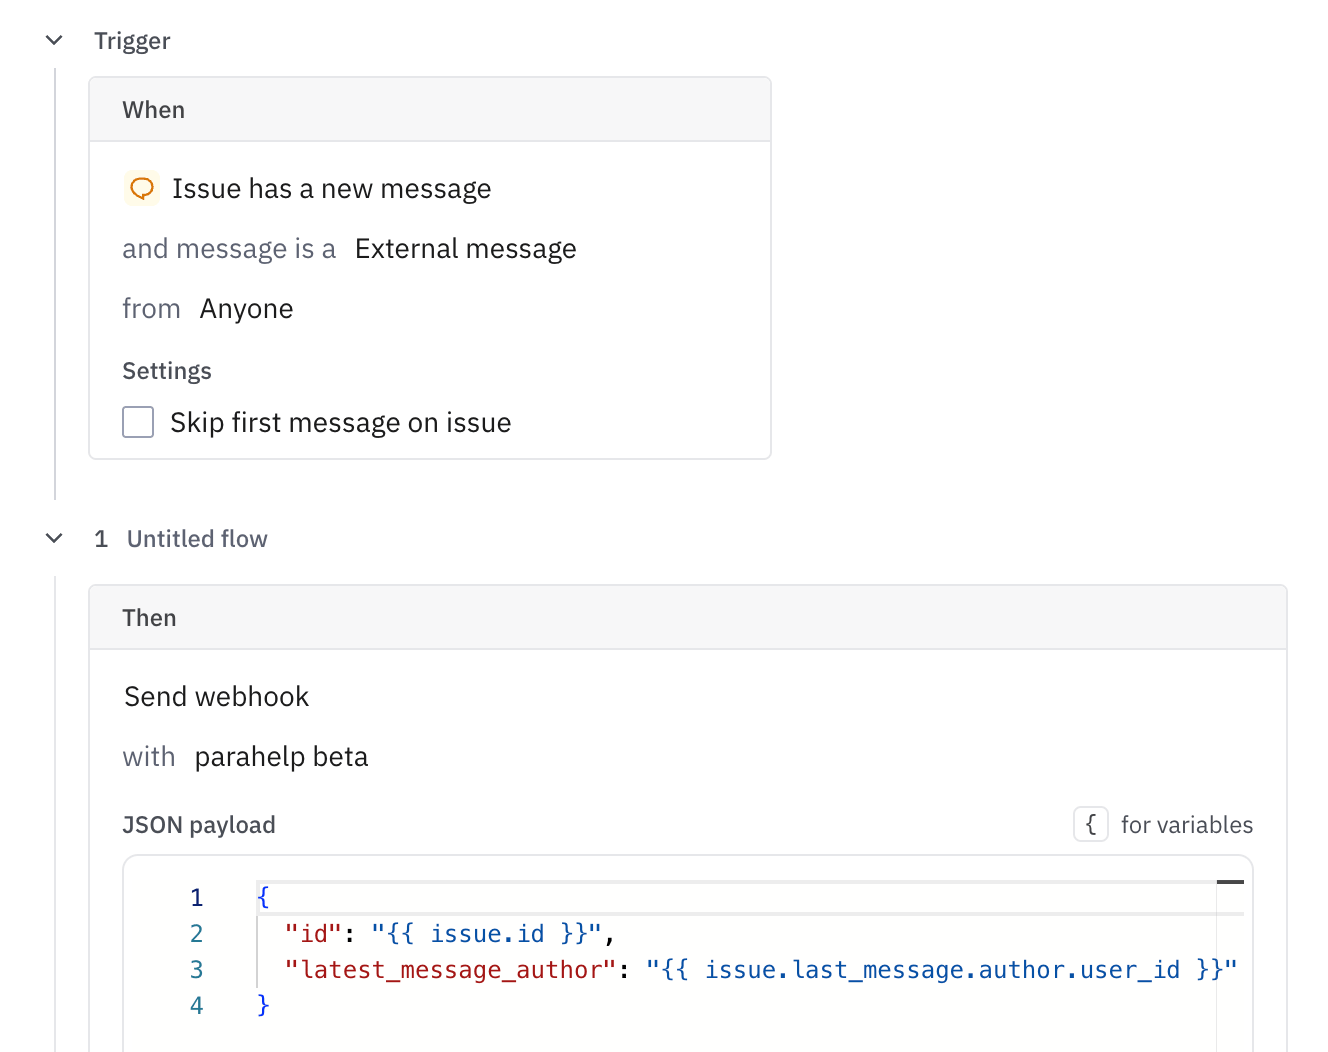
3
Create a new trigger called "Parahelp: Issue status"
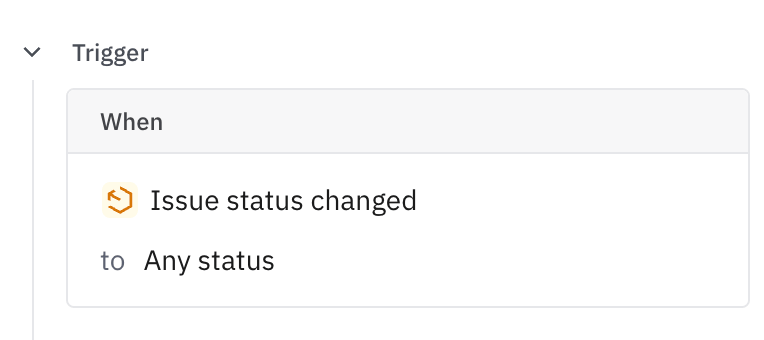
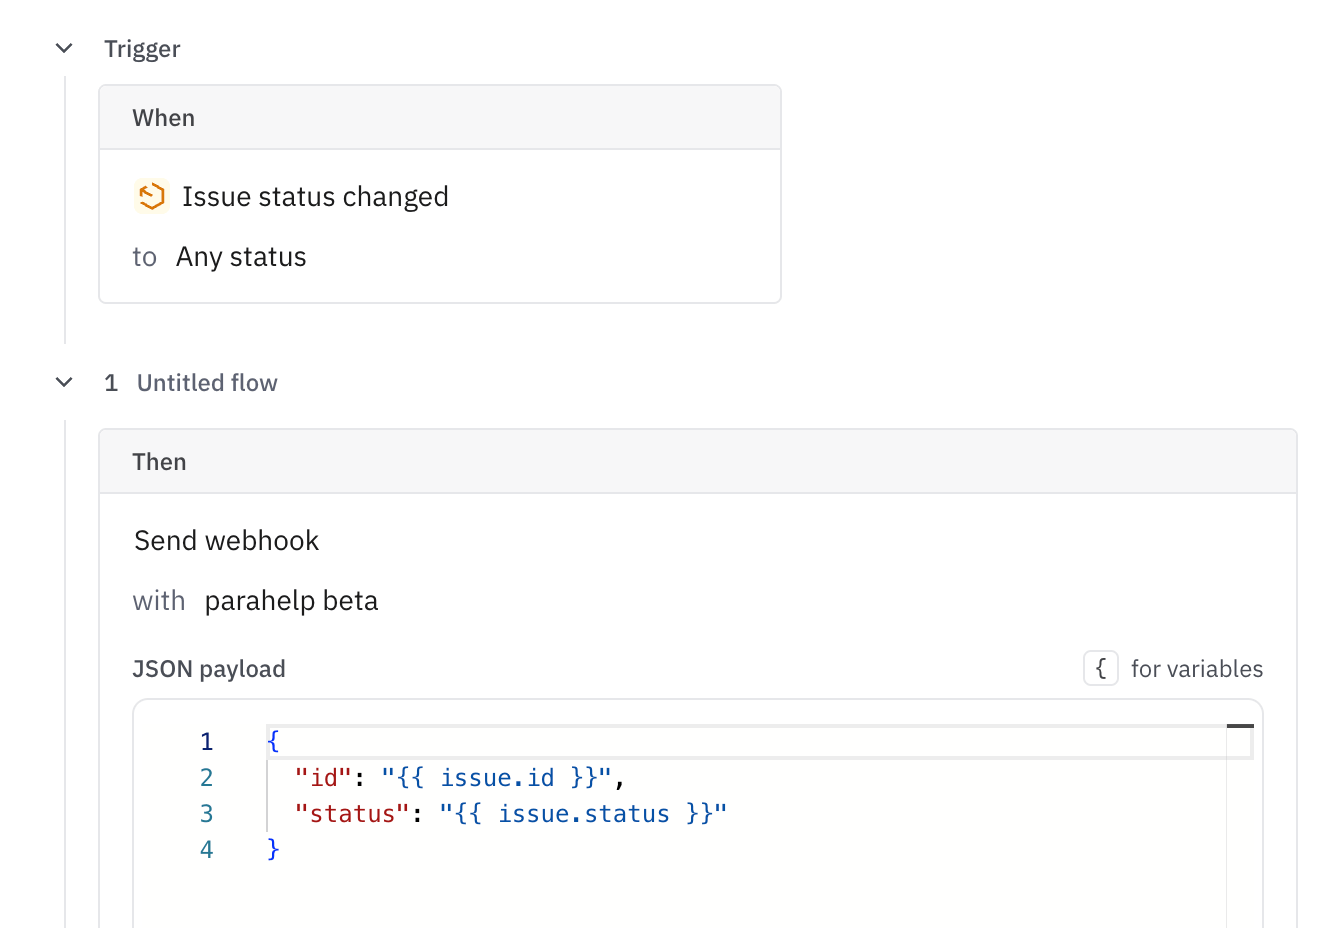
4
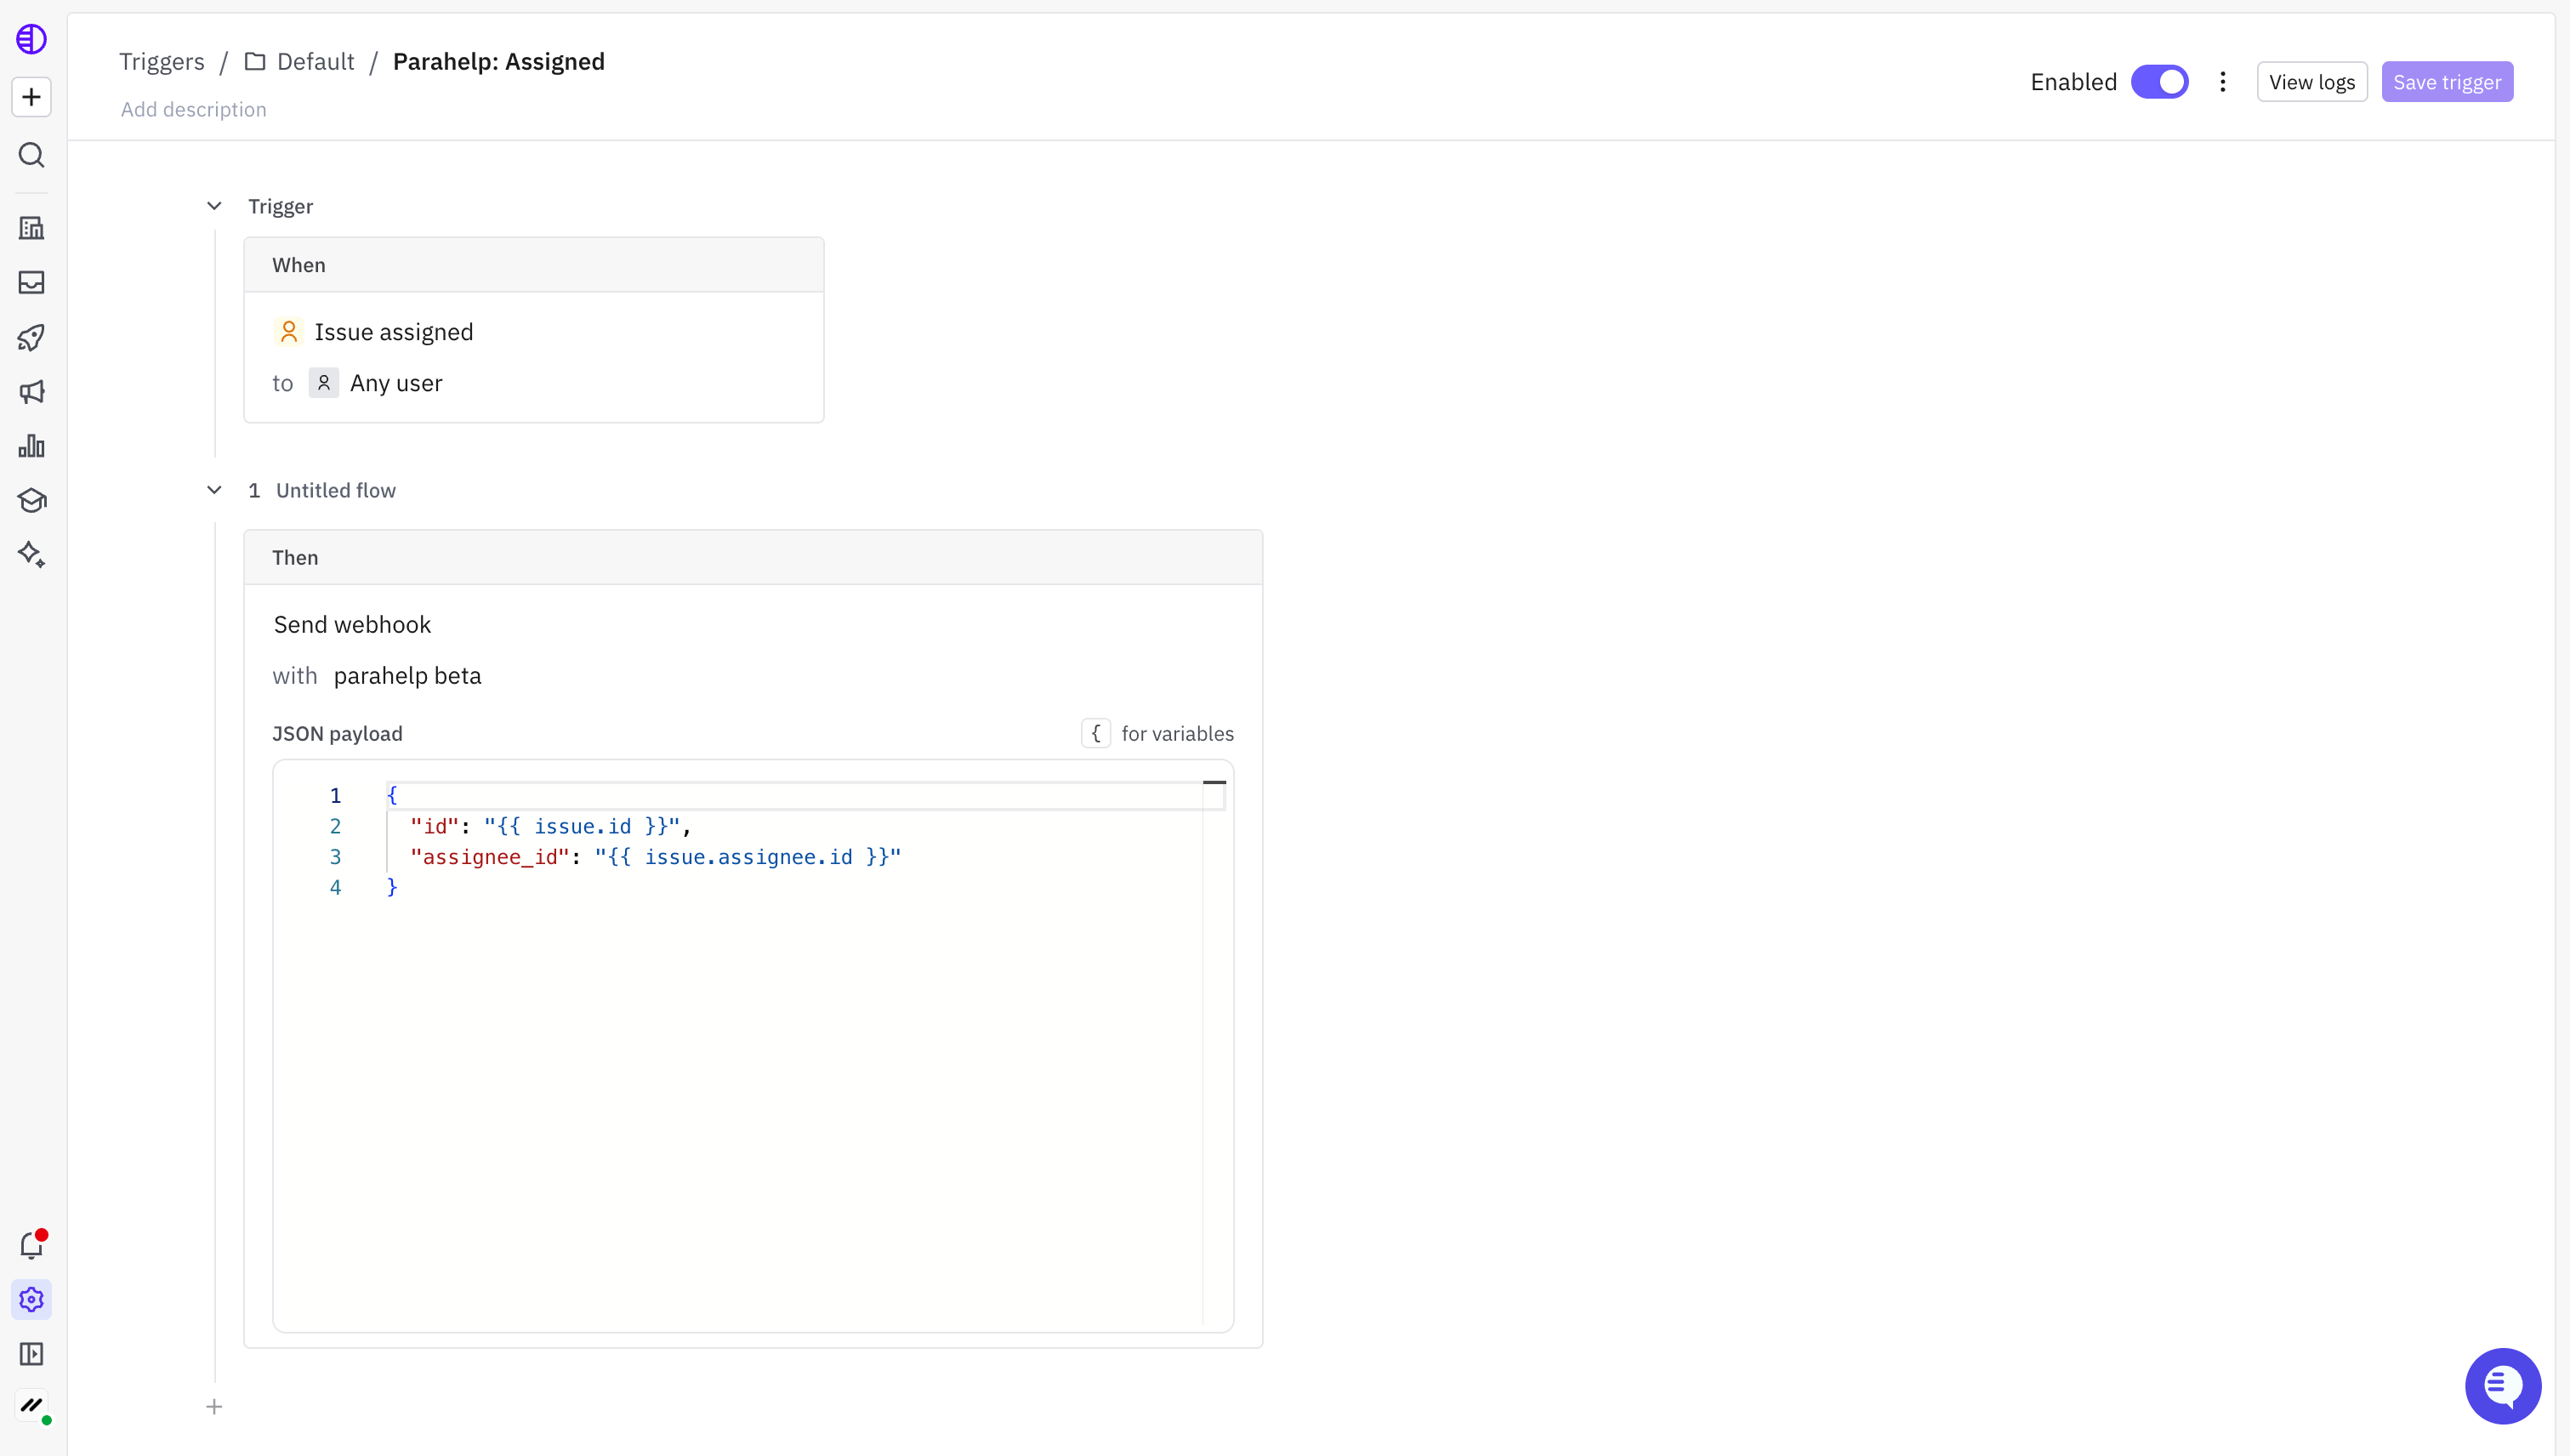
Create a new trigger called "Parahelp: Assigned"
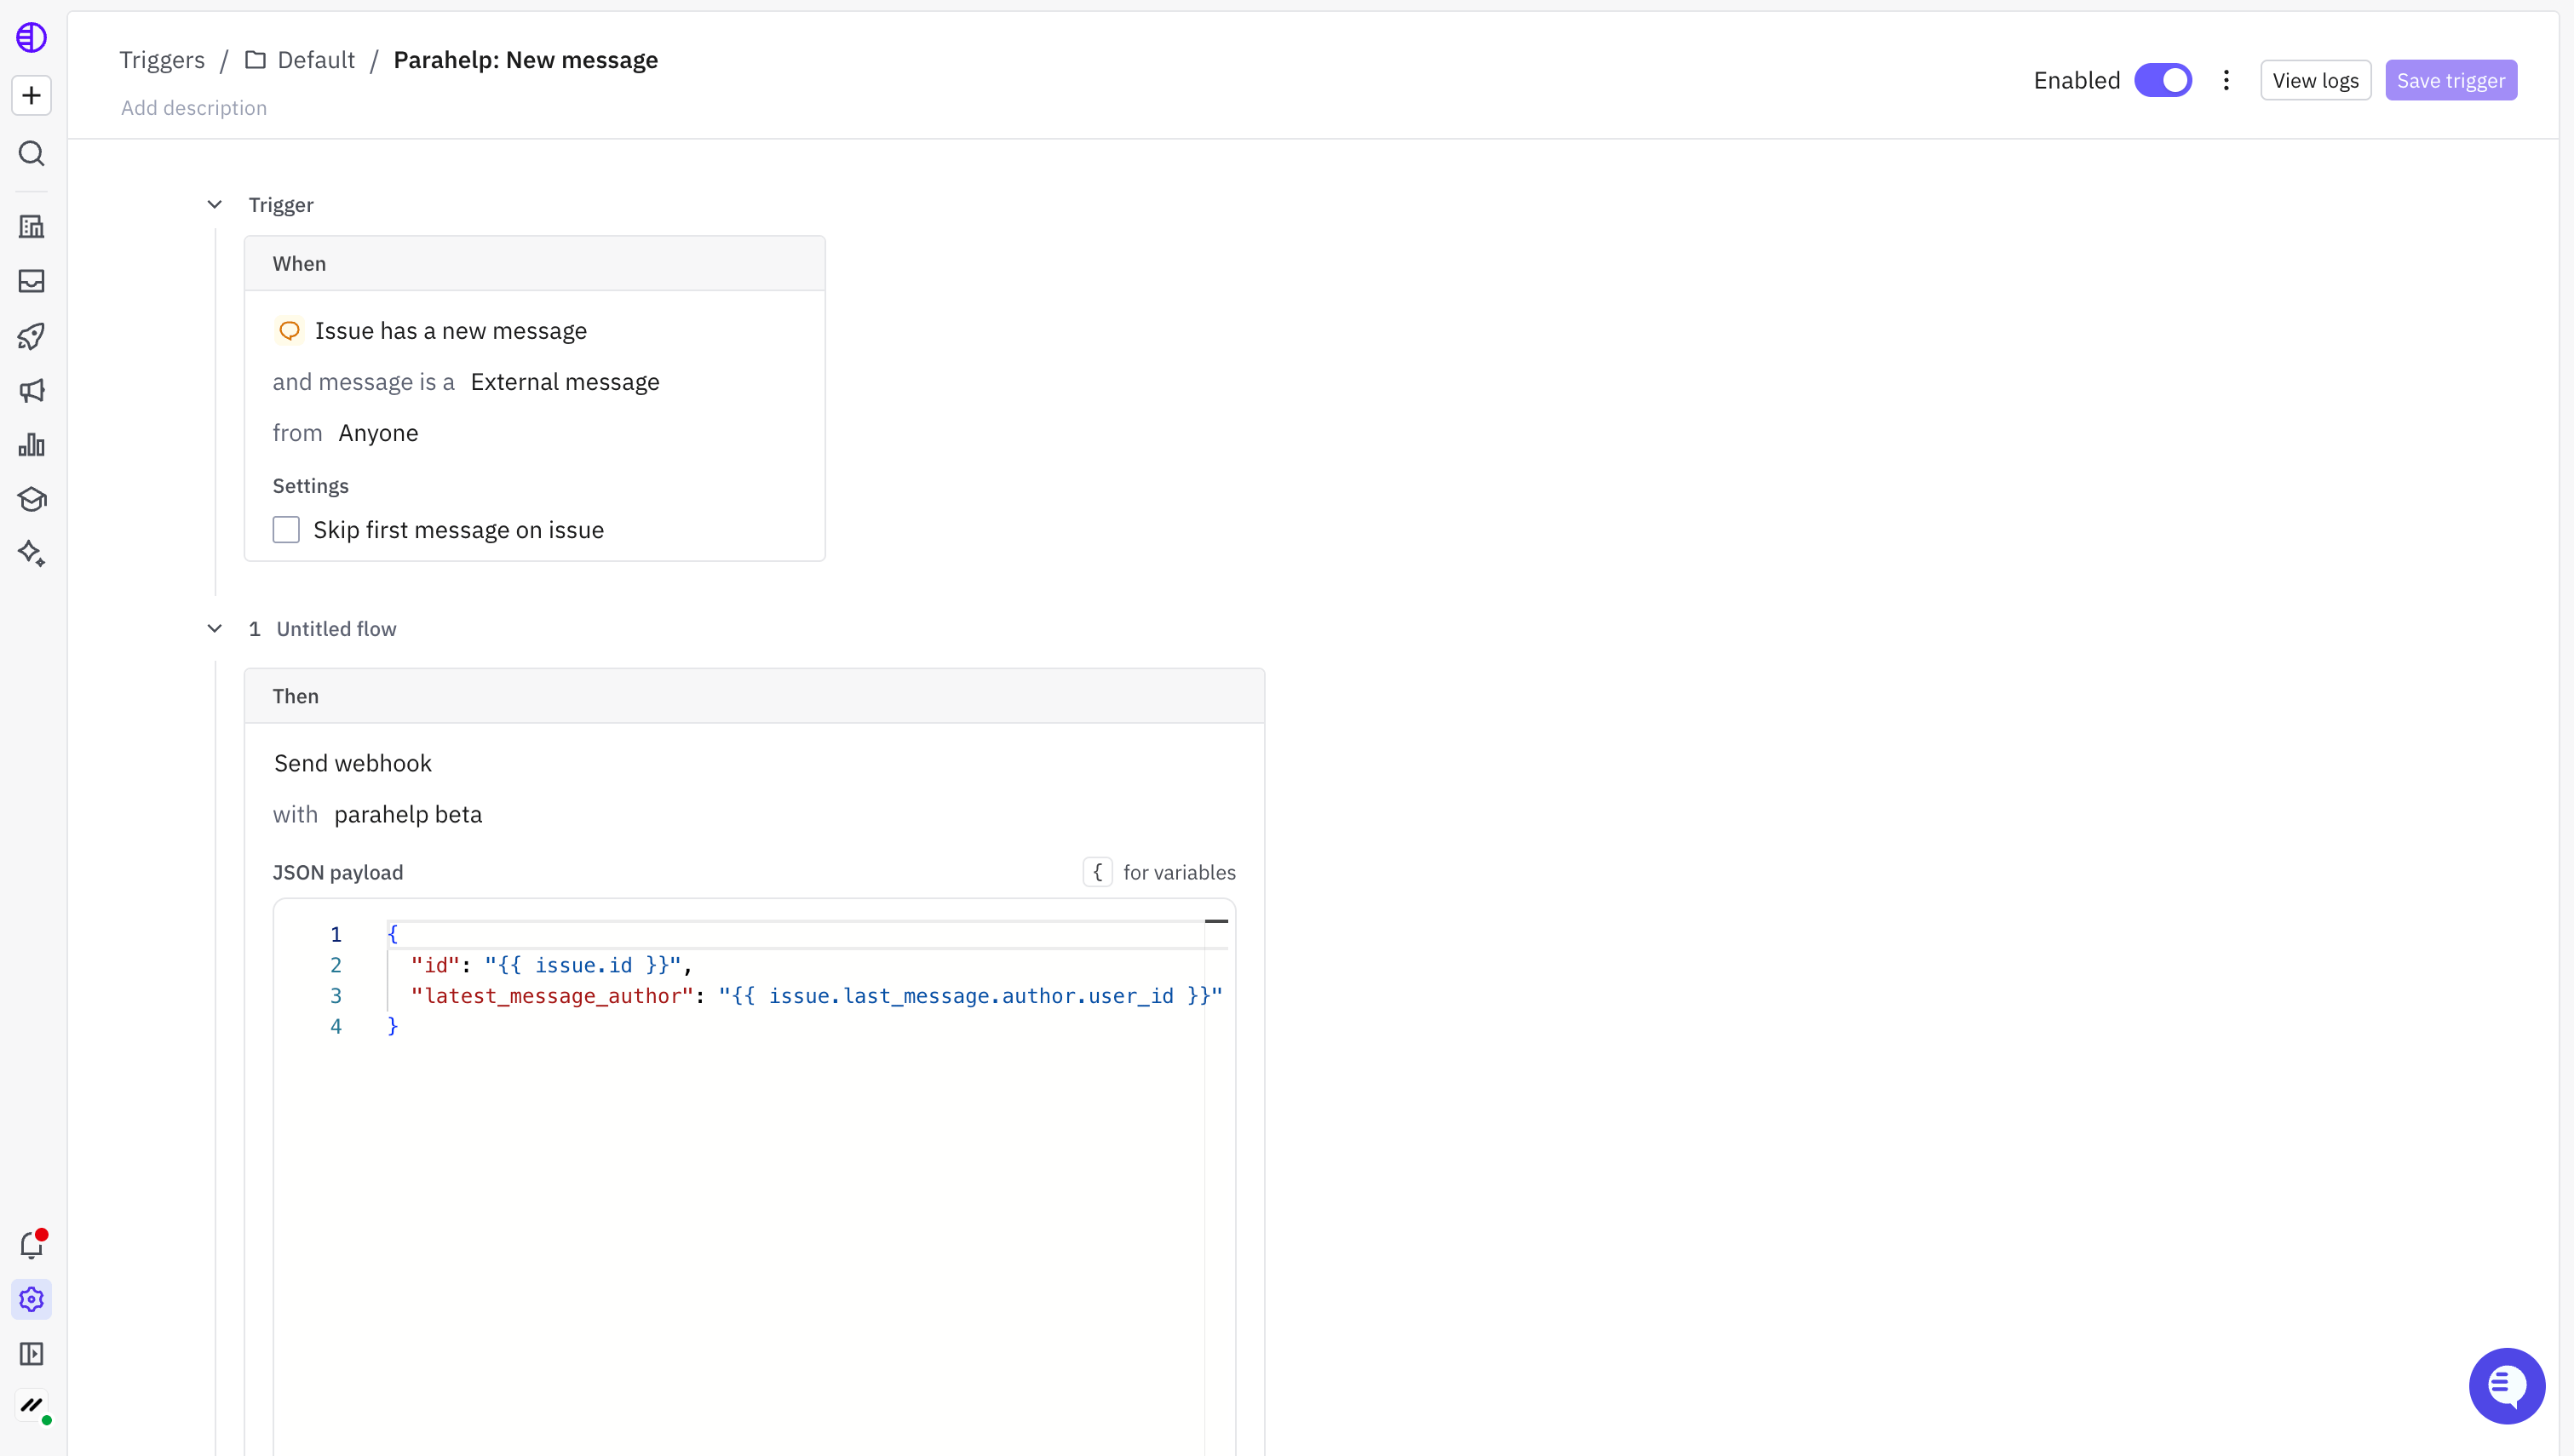
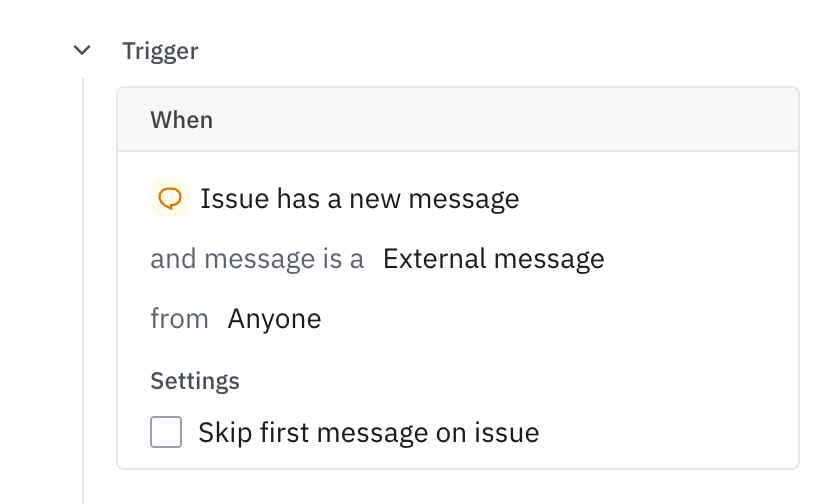
5
Create a new trigger called "Parahelp: Issue status"
6
Activate the triggers
After the webhook secret is saved in Parahelp, activate all three triggers. Events only arrive while the triggers are active.